8.1 Hello World (Python)
While eCAL is written in C++, it also offers a great python integration. Again, we are going to explore that integration by implementing a Hello World Application, that sends the string “Hello World” to an eCAL topic.
8.1.1 Dependencies
First, you have to install some more development dependencies:
-
Windows:
- Python 3 64-bit (https://www.python.org/downloads/)
- The eCAL python integration. Choose the appropiate version from the All releases and download the
.whlfile. Open a command prompt in your donwload directory and install the python whl with:Terminal window pip install ecal5-****-win_amd64.whl
-
Ubuntu:
- Python 3:
Terminal window sudo apt install python3 python3-pip - The eCAL Python integration.
- If you have installed eCAL from a PPA:
Terminal window sudo apt install python3-ecal5 - If you are not using a PPA, choose the appropiate version from the All releases and download the
.whlfile. Open a terminal in your donwload directory and install the python whl with:Terminal window sudo pip3 install ecal5-*-linux_x86_64.whl
- If you have installed eCAL from a PPA:
- Python 3:
8.1.2 Hello World Publisher
Somewhere on your hard drive create an empty directory and create a file hello_world_snd.py with the following content:
1import sys2import time3
4import ecal.core.core as ecal_core5from ecal.core.publisher import StringPublisher6
7if __name__ == "__main__":8  # initialize eCAL API. The name of our Process will be "Python Hello World Publisher"9  ecal_core.initialize(sys.argv, "Python Hello World Publisher")10
11  # Create a String Publisher that publishes on the topic "hello_world_python_topic"12  pub = StringPublisher("hello_world_python_topic")13
14  # Create a counter, so something changes in our message15  counter = 016
17  # Infinite loop (using ecal_core.ok() will enable us to gracefully shutdown18  # the process from another application)19  while ecal_core.ok():20    # Create a message with a counter an publish it to the topic21    current_message = "Hello World {:6d}".format(counter)22    print("Sending: {}".format(current_message))23    pub.send(current_message)24
25    # Sleep 500 ms26    time.sleep(0.5)27
28    counter = counter + 129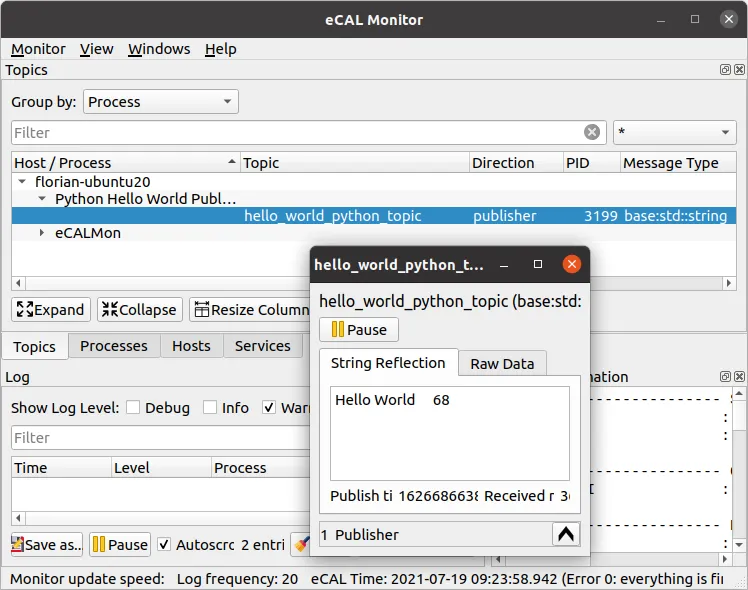
30 # finalize eCAL API31 ecal_core.finalize()Now execute your python hello world script and take a look at the eCAL Monitor! You will see the “Python Hello World Publisher” process and the “hello_world_python_topic”.
- Windows:
python hello_world_snd.py - Ubuntu:
python3 hello_world_snd.py
8.1.3 Hello World Subscriber
For the subscriber, create another file hello_world_rec.py with the following content:
1import sys2import time3
4import ecal.core.core as ecal_core5from ecal.core.publisher import StringPublisher6
7if __name__ == "__main__":8  # initialize eCAL API. The name of our Process will be "Python Hello World Publisher"9  ecal_core.initialize(sys.argv, "Python Hello World Publisher")10
11  # Create a String Publisher that publishes on the topic "hello_world_python_topic"12  pub = StringPublisher("hello_world_python_topic")13
14  # Create a counter, so something changes in our message15  counter = 016
17  # Infinite loop (using ecal_core.ok() will enable us to gracefully shutdown18  # the process from another application)19  while ecal_core.ok():20    # Create a message with a counter an publish it to the topic21    current_message = "Hello World {:6d}".format(counter)22    print("Sending: {}".format(current_message))23    pub.send(current_message)24
25    # Sleep 500 ms26    time.sleep(0.5)27
28    counter = counter + 129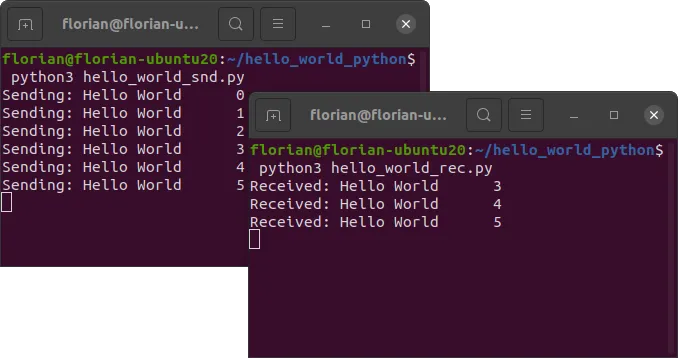
30 # finalize eCAL API31 ecal_core.finalize()When you now execute hello_world_snd.py and hello_world_rec.py, the receiver application will receive the messages sent by the sender.
Awesome, you have written your first eCAL publisher and subscriber with python! In general however you will want to have a better way to structure your data than a raw string. So let’s head on to the next topic where we will check out protobuf!
8.1.4 Files
Directory